Software Settings
Configuring the Software
Once the upload is complete, open the Serial Monitor and look for the line:
*wm:[1] StartAP with SSID: ESP32_48BD9E7C
You’re looking for that SSID specifically. You should now be able to go to your WiFi
network and connect to that SSID. Once connected, look for the IP address you’ve been assigned, which
should be something like 192.168.4.2. Point your web browser at the Gateway Address for that IP
address (it will be the same address, but ending in 1, so in the above example it should be
192.168.4.1).
You should be greeted with the Welcome page:
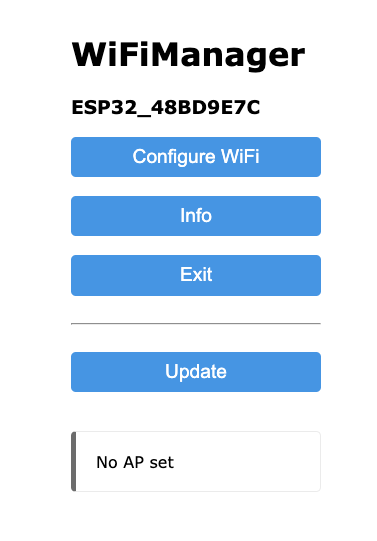
Click on Configure WiFi and you will see the configuration page:
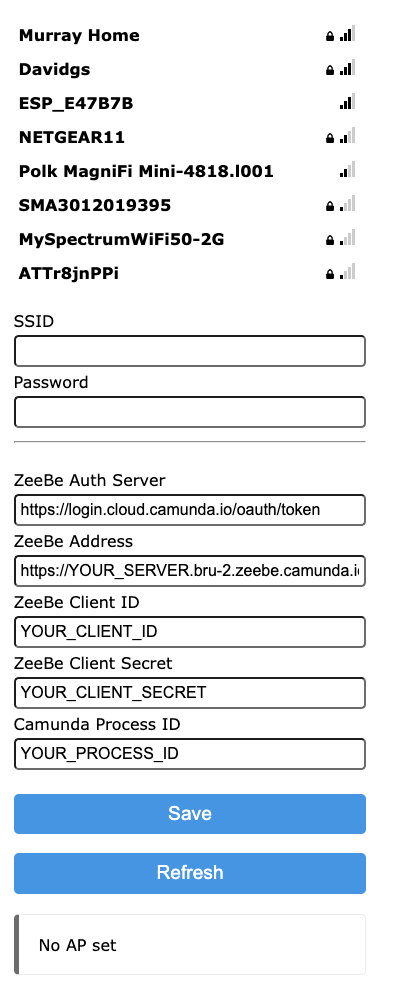
SSID: The name of the WiFi network you are connecting to.Password: The password for the WiFi network you are connecting to.ZeeBe Auth Server: This should not need to be changed.ZeeBe Address: The address of your C8 Cluster.ZeeBe Client ID: The client ID for your C8 Cluster.ZeeBe Client Secret: The client secret for your C8 Cluster.Camunda Process ID: The Process ID of your process.
We will be using this configuration page a few times, so having your C8 Cluster information handy is a good idea. You can always get back to this configuration page by holding down the first button on your board and waiting for the board to reset and give you the SSID again in the Serial Monitor.
For the Camunda Process ID field, you can enter C8Skittles-start for now.
Your ESP32-CAM should now be connected to the WiFi Network and be ready to submit pictures to the process (don’t press the button just yet, since you don’t have a process yet).