Configuration
Configuring the hardware
Now that you’ve assembled the hardware, you’ll need to configure it to use as a camera.
We will need to connect it to WiFi and set the email credentials so it can send you pictures.
This is a fairly easy process thanks to the WiFiManager library that we will be using.
The first step is to open the Arduino IDE and open the EmailPhoto app. You can download it here sketch.
Unzip that file and open the EmailPhoto.ino file in the Arduino IDE.
It should also open the following required files:
app_httpd.cppcamera_index.hcamera_pins.h
Finally, plug everything in to your laptop and make sure the board is selected in the IDE.
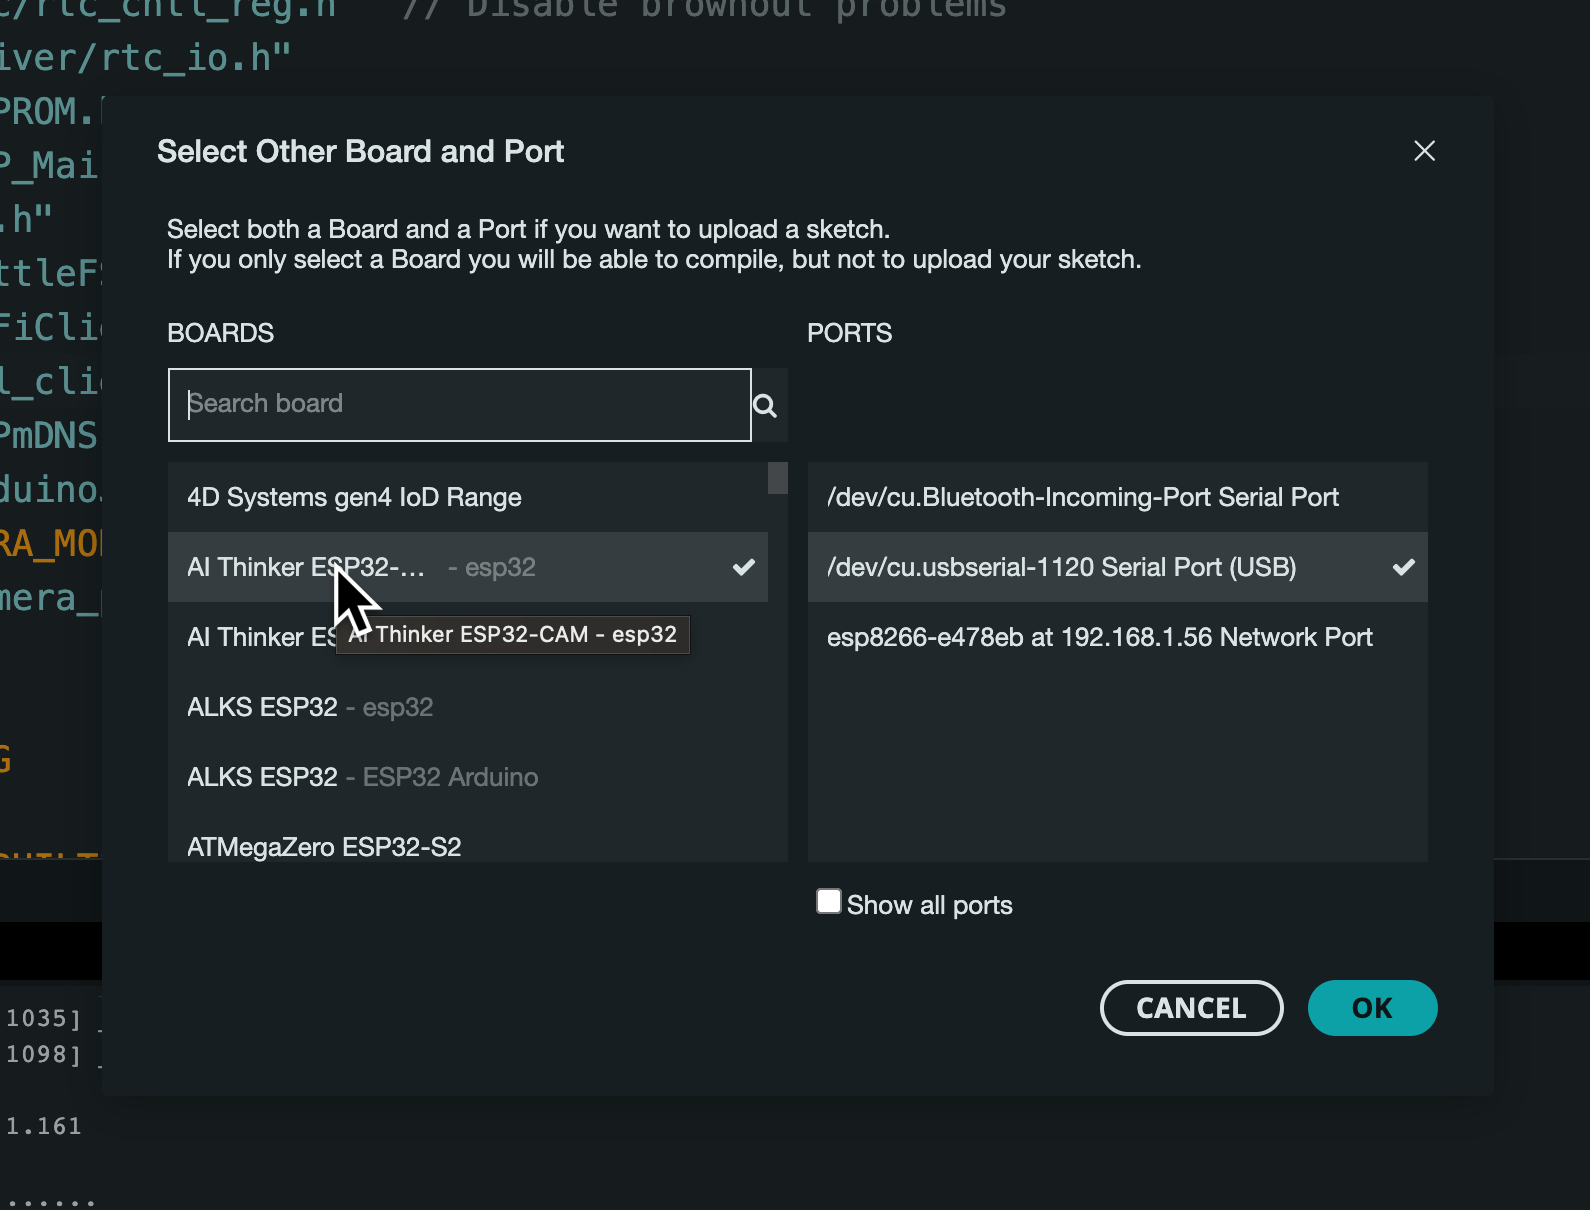
All you should need to do at this point is plug your ESP32-CAM into the USB port on your laptop and click upload to load the sketch to your device.
But wait, there’s one more thing! This board, since it doesn’t have a built-in programmer, needs to be set into Download mode before you can load any code onto it. To do that, unplug the board from your computer (to power it off), and connect a single jumper wire between Gnd and IO0 on the board.
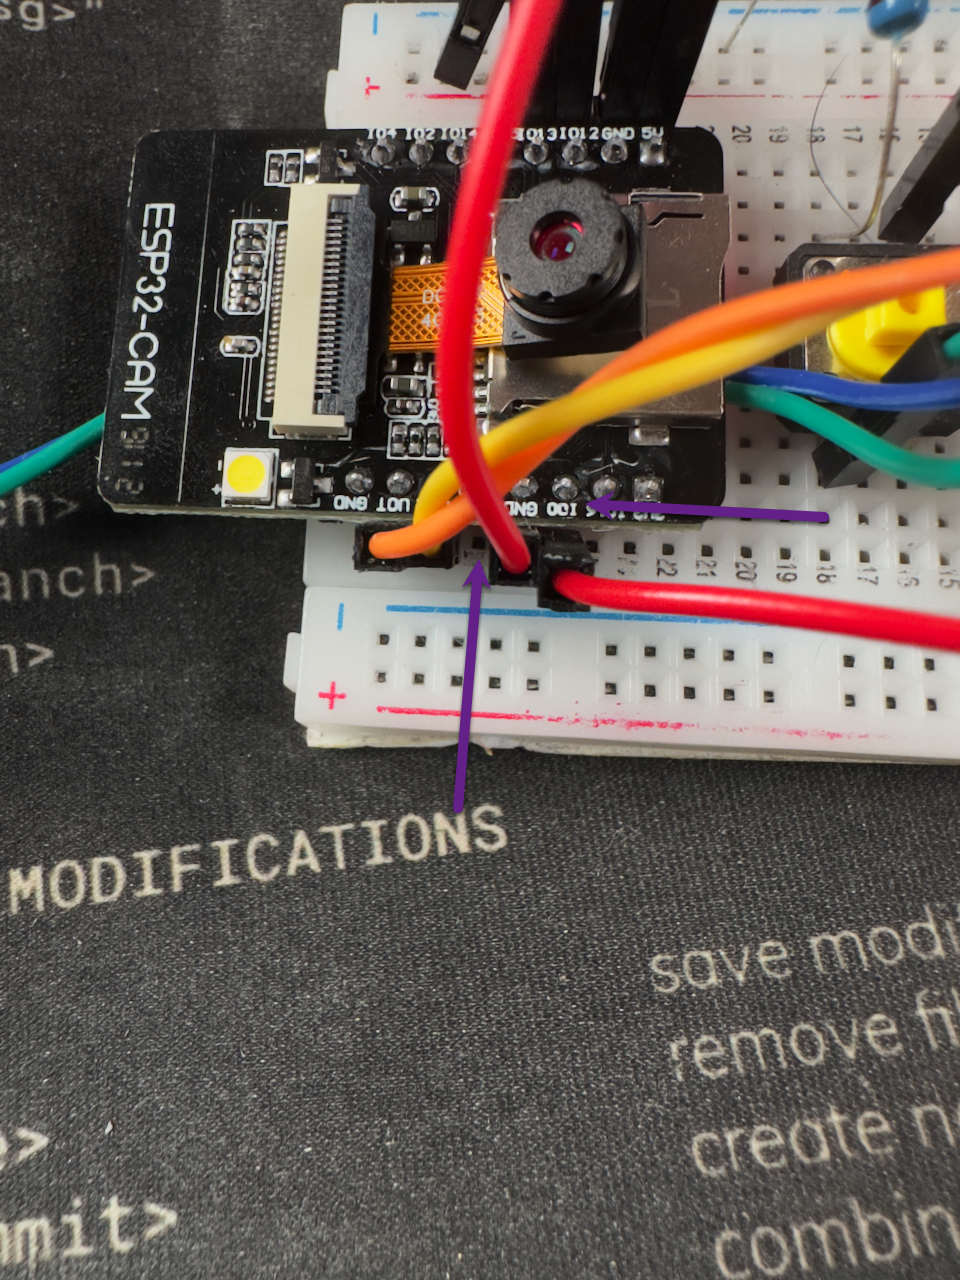
Note: Notice the one open pin between the two pins we’re connecting. This is important! If you connect the jumper wire to the wrong pins, you could damage the board!
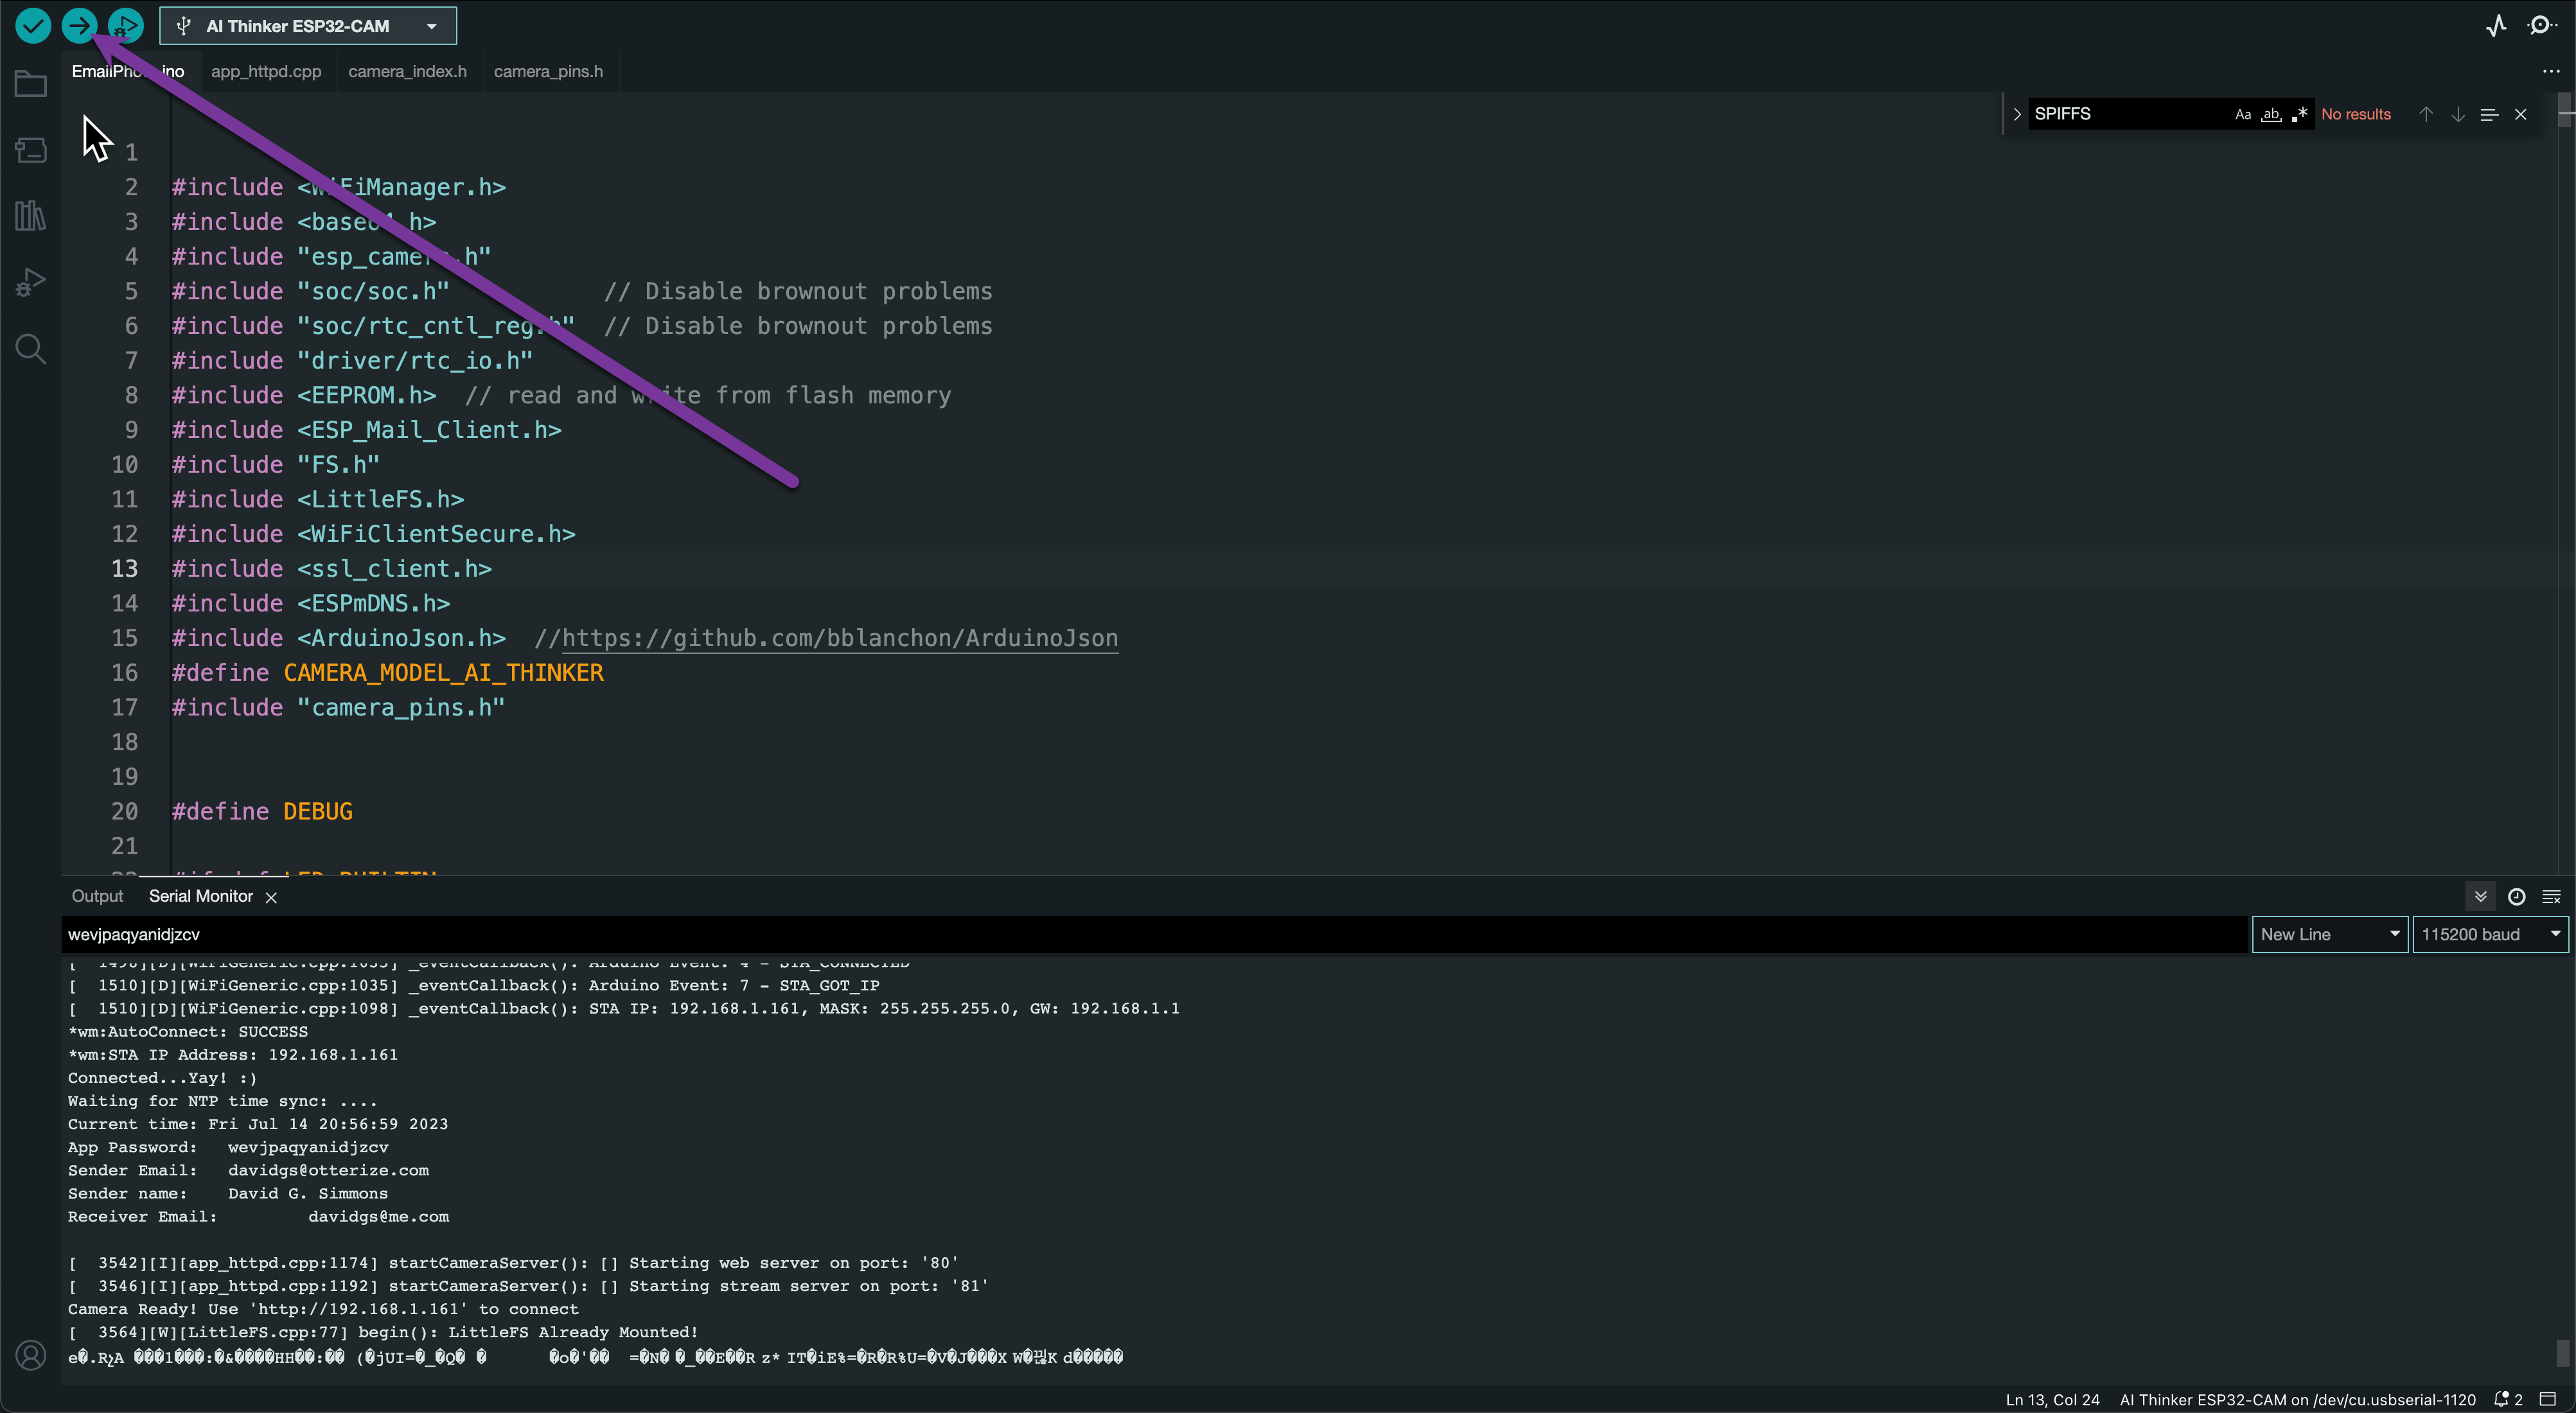
Then plug the board back into your computer. If you have the Serial Monitor open, you should see a message like:
Awaiting Download
Though it may just look like garbage characters.
e�.RչA ���1���:�&����HH��:�� (�jUI=�_�Q�� �o�'�� =�N��_��E��Rz*IT�iE%=�R�R%U=�V�J���XW�끦Kd�����
Now you can click upload in the IDE and the code should load onto the board.
Troubleshooting
If you’re having trouble with the port “timing out”, try reducing the port speed to 115200. If you’re unable to reduce the port speed, you can open a terminal and run the following command:
$ esptool.py -p YOUR_PORT -b 115200 ...and then copy/paste the failed command from the Arduino IDE window (the part after the
-psection) into the terminal.
Once the upload is complete, open the Serial Monitor to see the output from the board. You should see something like:
*wm:AP IP address: 192.168.4.1
Entered config mode
192.168.4.1
ESP32_7BA8CC84
*wm:Starting Web Portal
*wm:6 networks found