Quickly Connect an Argon IoT Device to QuestDB
I’m back to Particle.io again. I saw that they were having a 30% off sale on the new Argon and some developer kits, so I had to jump on it, since I haven’t gotten any new Particle hardware in years. So, what follows is a complete guide to connecting one of these kits to QuestDB in order to store the data, and then building a dashboard on top of it with Grafana . Buckle up!
The Hardware
First, I saw a 30% discount on the Argon DevKits (curse you twitter ads!) so I bought one of the Argon Air Quality Monitoring Kits. Y’all know I love to monitor air quality! It’s a really easy kit to assemble as there are no wires to solder or anything. All the sensors are connected using a Grove shield so it’s really just plug-and-play.
The Setup
I’m not going to go through it all step by step because there’s an excellent tutorial available already that will get you about 95% of the way there. That tutorial will get your kit all put together and all the code written to start sending your data to the Particle Cloud. I did make a few changes to the code, which I will go through. First, their tutorial uses int s for all the data coming off of the BME280 sensor. Having worked with these little things for a very long time, I know that they can deliver more accuracy, so I changed them all to **floats**.
float temp, pressure, humidity;
That means that you have to go change the signatures for a bunch of the functions to take **float** rather than **int** so make sure you get all that done (I’ll post the complete code, including all of my changes, at the end.
The other change I made was to send zero-values for sensor readings that failed to happen. The dust sensor specifically would just leave out the values if they were not rational, and so I changed it to send zeros in those cases in order to keep the database consistent and not have a bunch of null values in there.
The Cloud Portion
When you send data to the Particle Cloud, not much happens after that. It’s not stored anywhere, or sent anywhere until you configure someplace to send it for storage and analysis. There are a few pre-configured places to send your data, but the easiest to use is the Wbhook framework provided. This lets you construct a message and then send it to an arbitrary http end point whenever a new message arrives.
Of course, I did write up a complete tutorial on this, and it’s now part of the Particle.io docs. In that tutorial I was still using the int values from the BME280 because I didn’t want to confuse folks and for the consistency with the other Particle docs.
The Database Portion
We’re going to need an instance of a QuestDB database, of course. This instance can’t be running on your laptop, etc. unless you have a way to access your laptop from the open internet. (Hint: That’s not usually a great idea.)
You can spin up a Digital Ocean Droplet, or a small AWS linux instance, or whatever you want in order to get yourself an accessible version of QuestDB running.
Once you have that, you can go to the QuestDB console at http://<your server address>:9000/ and create the following table:
CREATE TABLE ArgonAir (
  deviceID SYMBOL,
  temperature DOUBLE,
  humidity DOUBLE,
  Pressure DOUBLE,
  AirQuality SYMBOL,
  dustLpo DOUBLE,
  dustRatio DOUBLE,
  dustConc DOUBLE,
  ts timestamp
) timestamp(ts);
This will create the proper table structure for your device. A couple of things to note: QuestDB is much faster if you use the SYMBOL datatype in place of the STRING datatype, which is why you see that above. In addition, the timestamp(ts) part promotes the ts field to be a designated timestamp, which you will want for doing Time Series calculations on your data.
You can then refresh your Tables view in the console, and you should see your table laid out:
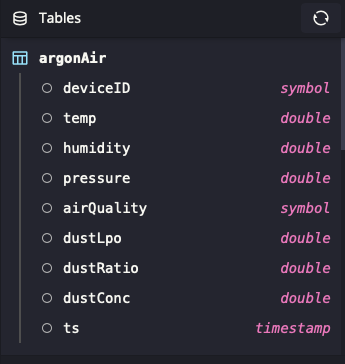
Once you have your table, it’s a matter of getting data into it. You’ll notice that, while the Particle on-device code uses fields like “air-quality” I have removed the hyphens from those names. The database likes that better.
Go to the Integrations tab of your Particle Console and click on New Integration, and then click on Web Hook
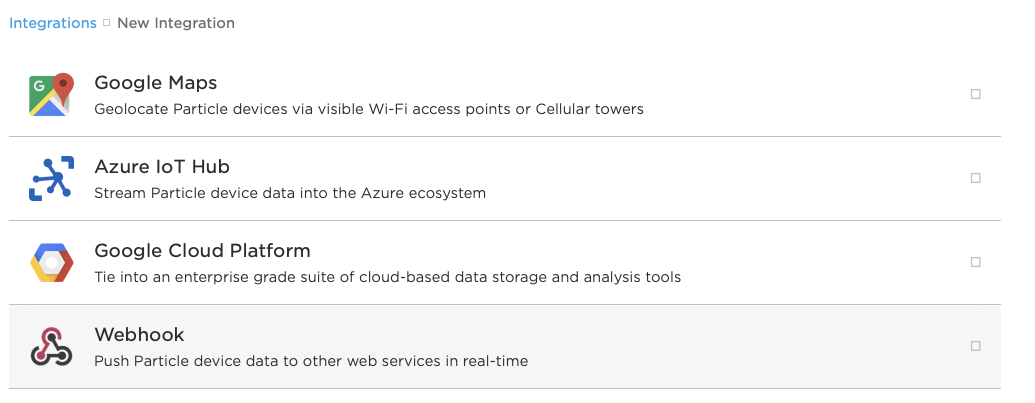
Once there, we’ll fill in the form. According to the tutorial, our event is called env-vals, so enter that under Event Name.
Under URL enter the address of your QuestDB Server http:my.server.com:9000 or wherever your server is located.
Then change the Request Type to GET, and the Request Format to Query Parameters
Now for the trickiest part: The actual query parameters. First, select Custom instead of Default, and in the first box, enter Content-Type in the next box on the same row, enter text/plain Then click on the + Add Row button.
In the new row, enter query in the first box, and in the next box, enter:
INSERT INTO ArgonAir VALUES(
  '{{PARTICLE_DEVICE_ID}}',
  {{temperature}},
  {{humidity}},
  {{pressure}},
  '{{air-quality}}',
  {{dust-lpo}},
  {{dust-ratio}},
  {{dust-concentration}},
  to_timestamp('{{PARTICLE_PUBLISHED_AT}}', 'yyyy-MM-ddTHH:mm:ss.SSSz')
);
Some explanation of that SQL. Particle includes some things in all of the payloads, and those are in all caps. There are more, and if you want to use more of them, just make sure there are columns in your database for whatever you want to store. The payload from the device itself can either be sent as a whole, or (and this was a new trick I learned) pulled out using the {{…}} notation as individual fields.
Finally the PARTICLE_PUBLISHED_AT timestamp is sent, along with the formatting string, so that QuestDB will know how to properly parse the date string as a timestamp upon arrival.
Your integration screen should look like this:
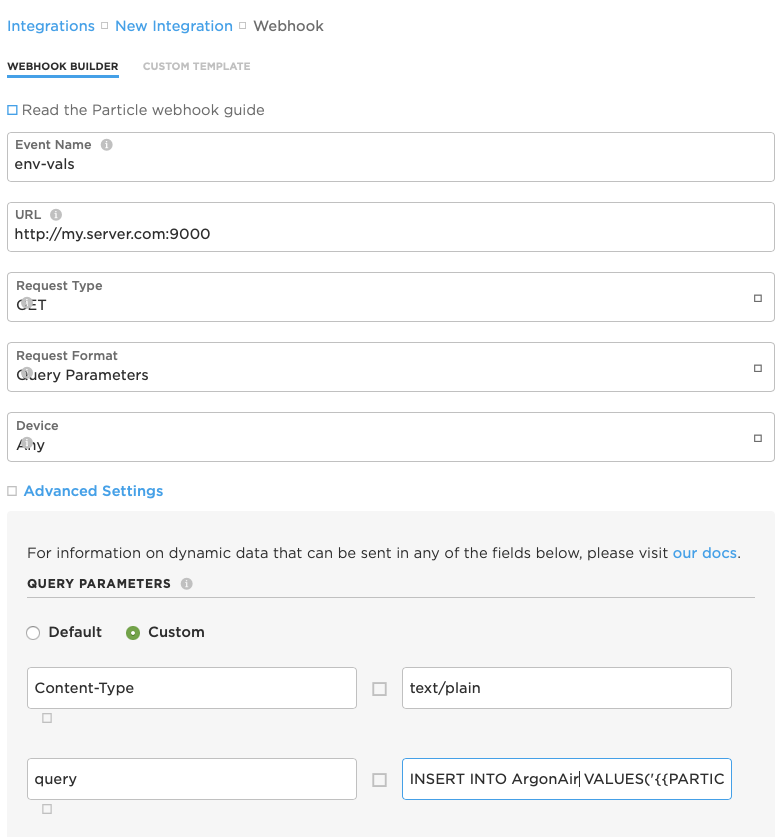
Don’t forget to scroll to the bottom and un check the Enforce SSL box, and then save your integration.
At this point, if your Air Quality Device is sending data to the Particle Cloud, you should begin to see readings show up in the QuestDB Console at regular intervals.
My database now looks like this:

Pretty spiffy. But it’s still not the nice dashboard I want.
The Dashboard Part
QuestDB is still waiting for their Grafana plugin to be approved, but I just couldn’t wait to build a dashboard, so I went off and (true to form) tried something entirely not supported just to see what happened. I used the Grafana Postgres plugin.
Guess what? It worked!
So, to configure the Postgres plugin for QuestDB:
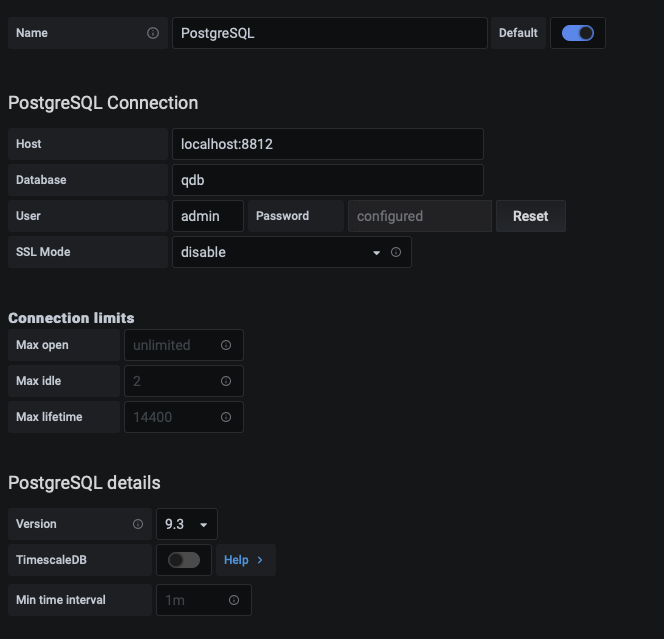
Just fill in the defaults from the QuestDB pgwire protocol settings.
Once you’ve done that, you can build out your dashboard:
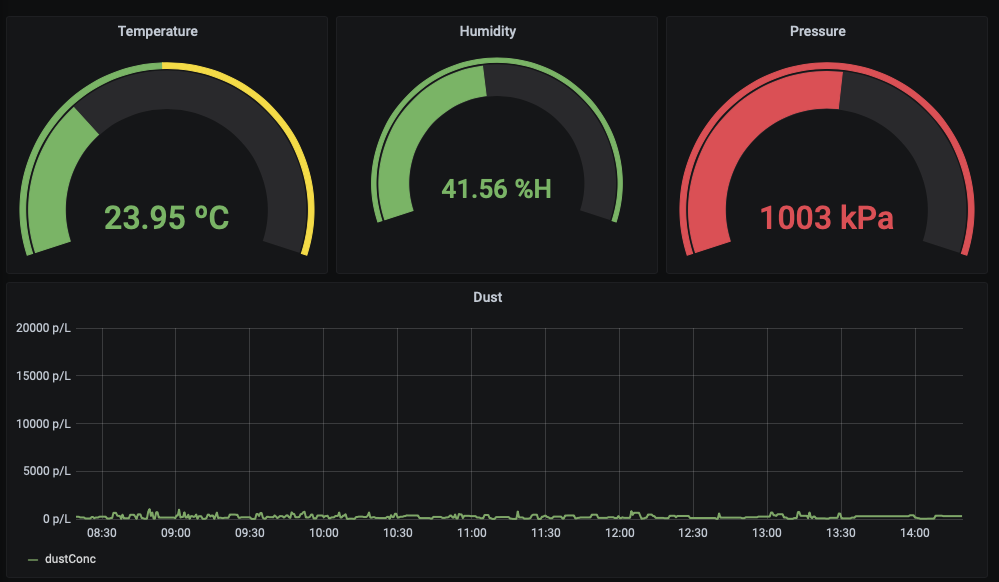
And there you have it!
All The Code
As promised, here is all the code that I deployed to my Argon device:
#include "math.h"
#include "Air_Quality_Sensor.h"
#include "Adafruit_BME280.h"
#include "SeeedOLED.h"
#include "JsonParserGeneratorRK.h"

#define DUST_SENSOR_PIN D4
#define SENSOR_READING_INTERVAL 30000
#define AQS_PIN A2

AirQualitySensor aqSensor(AQS_PIN);
Adafruit_BME280 bme;

unsigned long lastInterval;
unsigned long lowpulseoccupancy = 0;
unsigned long last_lpo = 0;
unsigned long duration;

float ratio = 0;
float concentration = 0;

// setup() runs once, when the device is first turned on.
void setup() {
  // Put initialization like pinMode and begin functions here.
  Serial.begin(9600);
  delay(1000);
  Serial.println("Starting ... ");
  pinMode(DUST_SENSOR_PIN, INPUT);
  lastInterval = millis();
  if (aqSensor.init()) {
    Serial.println("Air Quality Sensor ready.");
  } else {
    Serial.println("Air Quality Sensor ERROR!");
  }
  if (bme.begin()) {
    Serial.println("BME280 Sensor ready.");
  }  else {
    Serial.println("BME280 Sensor ERROR!");
  }
  Wire.begin();
  SeeedOled.init();
  SeeedOled.clearDisplay();
  SeeedOled.setNormalDisplay();
  SeeedOled.setPageMode();
  SeeedOled.setTextXY(2, 0);
  SeeedOled.putString("Particle");
  SeeedOled.setTextXY(3, 0);
  SeeedOled.putString("Air Quality");
  SeeedOled.setTextXY(4, 0);
  SeeedOled.putString("Monitor");
}

// loop() runs over and over again, as quickly as it can execute.
void loop() {
  float temp, pressure, humidity;

  // The core of your code will likely live here.
  duration = pulseIn(DUST_SENSOR_PIN, LOW);
  lowpulseoccupancy = lowpulseoccupancy + duration;
  if ((millis() - lastInterval) > SENSOR_READING_INTERVAL) {
    getDustSensorReadings();
    String quality = getAirQuality();
    Serial.printlnf("Air Quality: %s", quality.c_str());
    getBMEValues(temp, pressure, humidity);
    Serial.printlnf("Temp: %d", temp);
    Serial.printlnf("Pressure: %d", pressure);
    Serial.printlnf("Humidity: %d", humidity);
    updateDisplay(temp, humidity, pressure, quality);
    createEventPayload(temp, humidity, pressure, quality);
    lowpulseoccupancy = 0;
    lastInterval = millis();
  }
}

void getDustSensorReadings() {
  if (lowpulseoccupancy == 0) {
    lowpulseoccupancy = last_lpo;
  } else {
    last_lpo = lowpulseoccupancy;
  }
  ratio = lowpulseoccupancy / 10.0);
  concentration = 1.1 * pow(ratio, 3) - 3.8 * pow(ratio, 2) + 520 / ratio + 0.62;
  Serial.printlnf("LPO: %d", lowpulseoccupancy);
  Serial.printlnf("Ratio: %f%%", ratio);
  Serial.printlnf("Concentration: %f pcs/L", concentration);
}

String getAirQuality() {
  int quality = aqSensor.slope();
  String qual = "None";

  if (quality == AirQualitySensor::FORCE_SIGNAL) {
    qual = "Danger";
  } else if (quality == AirQualitySensor::HIGH_POLLUTION) {
    qual = "High Pollution";
  } else if (quality == AirQualitySensor::LOW_POLLUTION) {
    qual = "Low Pollution";
  } else if (quality == AirQualitySensor::FRESH_AIR) {
    qual = "Fresh Air";
  }
  return qual;
}

int getBMEValues(float &temp, float &pressure, float &humidity) {
  temp = bme.readTemperature();
  pressure = (bme.readPressure() / 100.0F);
  humidity = bme.readHumidity();
  return 1;
}

void updateDisplay(float temp, float humidity, float pressure, String airQuality) {
  SeeedOled.clearDisplay();

  SeeedOled.setTextXY(0, 3);
  SeeedOled.putString(airQuality);

  SeeedOled.setTextXY(2, 0);
  SeeedOled.putString("Temp: ");
  SeeedOled.putFloat(temp);
  SeeedOled.putString("C");

  SeeedOled.setTextXY(3, 0);
  SeeedOled.putString("Humidity: ");
  SeeedOled.putFloat(humidity);
  SeeedOled.putString("%");

  SeeedOled.setTextXY(4, 0);
  SeeedOled.putString("Press: ");
  SeeedOled.putFloat(pressure);
  SeeedOled.putString(" hPa");

  if (concentration > 1) {
    SeeedOled.setTextXY(5, 0);
    SeeedOled.putString("Dust: ");
    SeeedOled.putNumber(concentration); // Cast our float to an int to make it more compact
    SeeedOled.putString(" pcs/L");
  }
}

void createEventPayload(float temp, float humidity, float pressure, String airQuality) {
  JsonWriterStatic<256> jw;
  {
    JsonWriterAutoObject obj(&jw);

    jw.insertKeyValue("temp", temp * 1.00);
    jw.insertKeyValue("humidity", humidity * 1.00);
    jw.insertKeyValue("pressure", pressure * 1.00);
    jw.insertKeyValue("air-quality", airQuality);

    if (lowpulseoccupancy > 0) {
      jw.insertKeyValue("dust-lpo", lowpulseoccupancy);
      jw.insertKeyValue("dust-ratio", ratio);
      jw.insertKeyValue("dust-concentration", concentration);
    } else {
      jw.insertKeyValue("dust-lpo", 0.00);
      jw.insertKeyValue("dust-ratio", 0.00);
      jw.insertKeyValue("dust-concentration", 0.00);
    }
  }
  Particle.publish("env-vals", jw.getBuffer(), PRIVATE);
}
