


David G. Simmons
November 24, 2014
I'm an IoT Imp!
I got my electric imp and imp breakout board from SparkFun last week, and I decided to check it out today and see what I could do with it in an hour. I’m re-stocking my Internet of Things (IoT) bag of tricks, and this is the first device I’ve gotten in a while, so here’s how that went.
Of course I have the requisite unpacking porn.

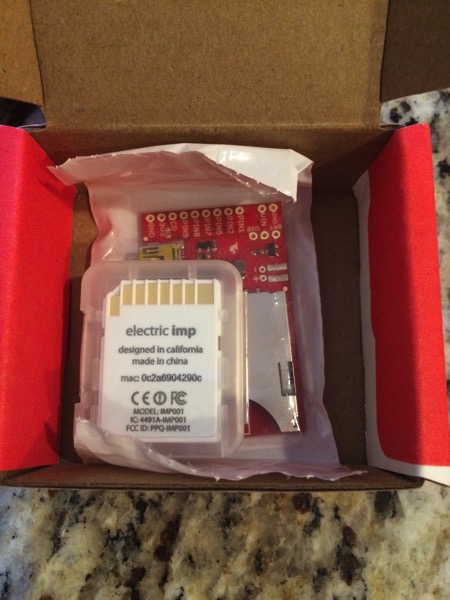
It’s actually a pretty nice bit of kit, with a Cortex M3 stuffed into a SSD Memory Card form factor. With WiFi included. That’s an awful lot stuffed into a very small package! I got to bust out my soldering iron and poke through my various boxes of parts and put some things together in order to get my hands dirty with the imp.
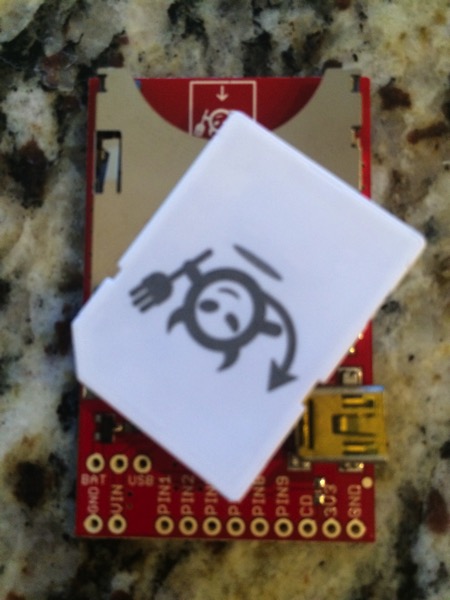
I will say that the mechanism for getting the WiFi configuration onto this device is … well, non-traditional. It has a small light sensor on the front edge, and you use your iPhone (or Android) phone to ‘flash’ the configuration. And by flash, I do mean flash. As in you enter your WiFi configuration into your phone, and then it literally flashes the display while you hold the Imp up to it. Needless to say, this mechanism is a bit imprecise. It took me a good 20 minutes and a number of tries before I managed to get it configured.
Once configured, I used the web-based development system (that is pretty nice) to extend one of the example programs. An interesting thing about the imp is that you can program on-device code as well as code to run in their cloud which you can access, and which will then interact with your device. So, as a first go, I pulled out some 300Ω resistors a couple of LEDs (a red one and a white one) and a bread-board. Here’s what I ended up with:
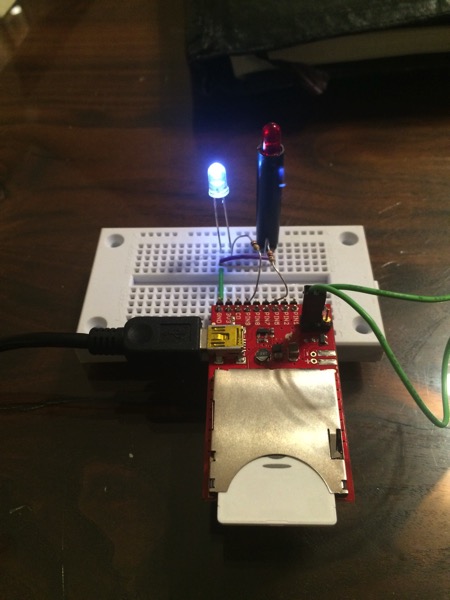
Yeah, I had to use a wire as a jumper. I can’t find any of my real jumpers. So sue me.
I modified the simple example program – and the hardware example – for fun. One interesting feature of the electric imp platform is that you can write code to execute on the device as well as separate code to run in the electric imp cloud.
// create global variables for red and white LEDs on pins 7 and 9
whiteLed <- hardware.pin9;
redLed <- hardware.pin7;

// configure leds to be a digital output
//add some logging stuff too.
whiteLed.configure(DIGITAL_OUT);
redLed.configure(DIGITAL_OUT);
server.log("White LED OFF!");
whiteLed.write(0);
server.log("Red LED OFF!");
redLed.write(0);

// function to turn White LED on or off
function setWhiteLed(ledState) {
  server.log("Set White LED: " + ledState);
  whiteLed.write(ledState);
}

// function to turn Red LED on or off
function setRedLed(ledState) {
  server.log("Set Red LED: " + ledState);
  redLed.write(ledState);
}

// register a handler for white "led" messages from the agent
agent.on("whiteLed", setWhiteLed);

// register handler for red LED messages from agent
agent.on("redLed", setRedLed);
It’s pretty straight forward to write code for this device. I also modified one of the sample programs to run in the electric imp cloud:
```cpp // Log the URLs we need server.log(“Turn White LED On: " + http.agenturl() + “?whiteLed=1”); server.log(“Turn White LED Off: " + http.agenturl() + “?whiteLed=0”); server.log(“Turn Red LED On: " + http.agenturl() + “?redLed=1”); server.log(“Turn Red LED Off: " + http.agenturl() + “redLed=0”);
function requestHandler(request, response) { try { // check if the user sent whiteLed as a query parameter if (“whiteLed” in request.query ) {
  // if they did, and led=1.. set our variable to 1
  if (request.query.whiteLed == "1" || request.query.whiteLed == "0") {
    // convert the led query parameter to an integer
    local whiteState = request.query.whiteLed.tointeger();
    // send "whiteLed" message to device, and send ledState as the data
    device.send("whiteLed", whiteState);
  }
}
// do the same thing for the red LED
if("redLed" in request.query){
  if (request.query.redLed == "1" || request.query.redLed == "0") {
    local redState = request.query.redLed.tointeger();
    device.send("redLed", redState);
  }
}
// send a response back saying everything was OK.
response.send(200, "OK");
} catch (ex) { response.send(500, “Internal Server Error: " + ex); } }
// register the HTTP handler http.onrequest(requestHandler);
Those `server.log()` calls at the front are actually fairly important as they print out to the console of the web IDE the actual secure URLs for accessing the service in the electric imp cloud. And the reaction from the device is near-instantaneous. Very impressive response time!

Now, all I have to do next is find some more interesting sensors -- I have boxes and boxes of them lying around here -- and then get to doing something interesting. As I said, this was a quick hour or so of playing around just to see how easy it would be to actually **do** something interesting with this device. Now that I know that it is, indeed, fairly easy to do, I think I'll give some thought to it and set about actually doing something more interesting than simply turning on and off some LEDs.

I'll get back to you on how that works. Feel free to send suggestions of what I might do that would be at least mildly interesting.
 English
 Deutsche
 Dutch
Dutch Español
 Français