


David G. Simmons
June 16, 2016
Solving a Traveling Salesman Problem
It’s not IoT, but still … Here’s the background on this project, and why I undertook it.
For the past 3 years or so my wife and I have been volunteering with the blind in our community. Every month our church organizes a dinner for the blind in the area and we drive around and pick up participants, take them to the church where we serve everyone dinner, and the drive them all home. It’s great fun, and something both we, and the people we drive, thoroughly enjoy. It gives them a chance to get together with friends and share a meal, some music and a great evening.
Logistically, though, it’s a bit of a nightmare. Every month there is a call for volunteers to drive, amassing the list of people that want to come, and then the arduous task of figuring out routes for everyone that minimizes travel time and maximizes efficiency. For the first few years this process was fairly opaque. Each month we would volunteer to drive, and then a week before the event we’d get an email with who we would pick up and their addresses, etc. Behind the scenes, however, one volunteer was spending hours mapping out the routes and assigning passengers to drivers in what was hoped would be an efficient manner. It wasn’t always.
This is exactly the kind of problem computers were designed to solve! So I volunteered to solve it once and for all. Ok, so computers can’t solve the problem, but a well-designed computer program could. I just had to write it.
The basic parameters are:
- About 30 volunteer drivers, each with their own ‘restrictions’ on how far they’re willing to drive, how many passengers they can take, etc.
- About 75 attendees. Some with dogs, some in wheelchairs, some with physical disabilities of various sorts, etc.
- The drivers and attendees change every month — there are regulars, like us, but not everyone can come/drive every month
Building a Solution
Clearly Google Maps was going to be part of the solution. Also, a backend database of some sort would be required to store the information about the drivers and attendees so we wouldn’t have to re-enter it every month. I had just completed a consulting project for StrongLoop applying their API creation and management framework to IoT, and it seemed a perfect solution to this problem as well. Here were the end requirements I set for myself:
- Web based application that would run in any browser
- Backing datastore for driver and attendee information
- Easy and intuitive to use, since not everyone is technology-savvy
- Automate as much of the process as possible
- Optimize the routes for the drivers
- Provide the drivers with a google map with their optimized route and turn-by-turn directions
Seemed simple enough. I already knew how to geolocate things on a google map via thegoogle maps API. I had (newly acquired) knowledge of using JavaScript and Node.js and loopback and MongoDB — and connecting them all together — to manage the data and the APIs. But how to actually build it? I mean, how to present the data and the interface in a simple UI that anyone could figure out.
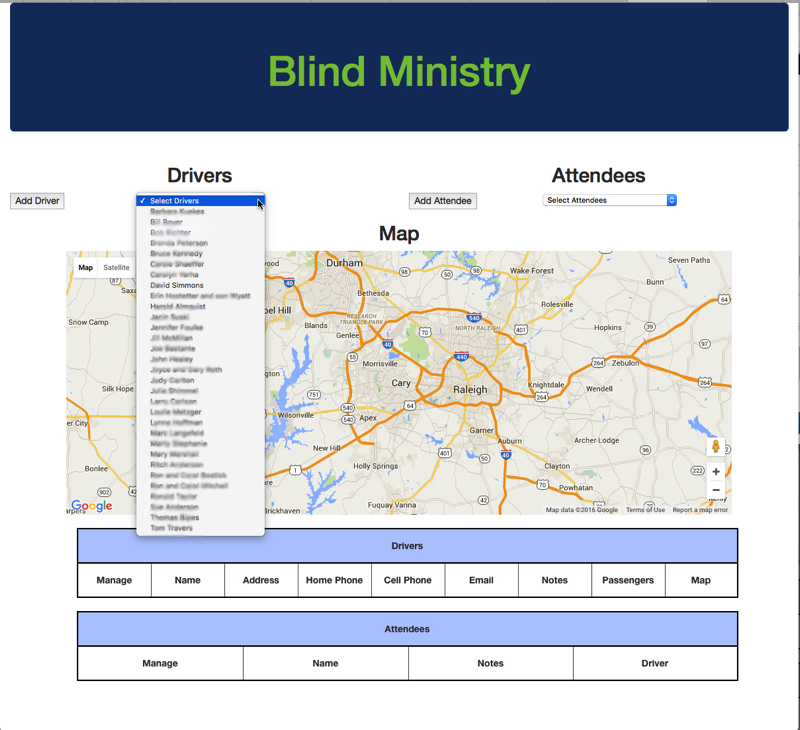
Here’s where I ended up. After this, I’ll briefly go through how I did it. I’ll walk through the work-flow a bit too. We start here, with a blank page, a Google Map, and some empty tables.
The Results

You can click on “Add Driver” and add a new driver to the Database. You get the same form if you click “Add Attendee”. All Drivers and Attendees are persisted in a MongoDB database.

There is a Drop-down list of all the drivers in the database, so you just have to select the ones that are driving this month:
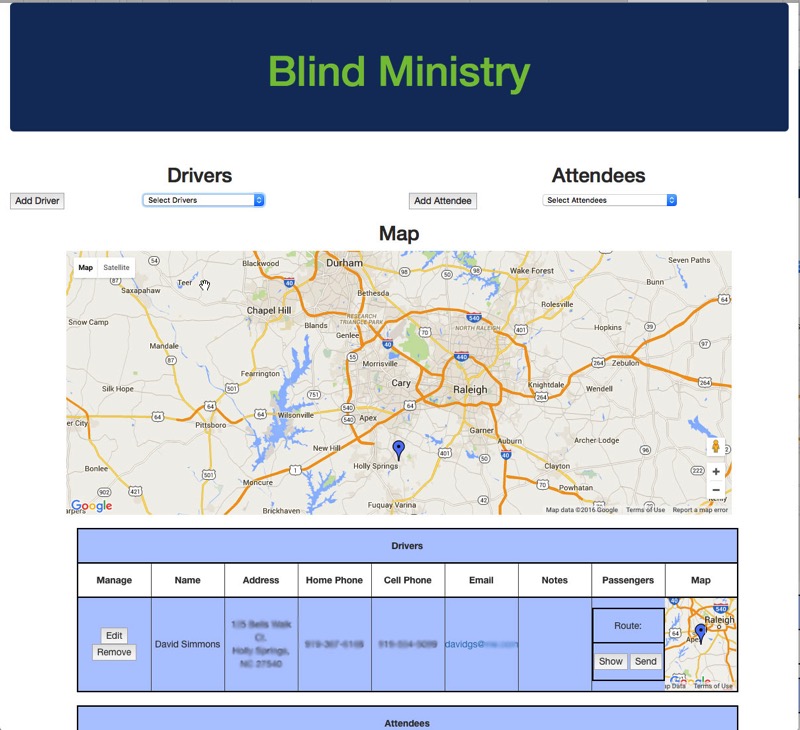
Once you select a Driver, they end up in the Drivers Table, with their own ‘mini-map’. A Blue Pin is also added to the main map. As you add more drivers, you’ll see more and more Blue Pins for drivers on the main map.
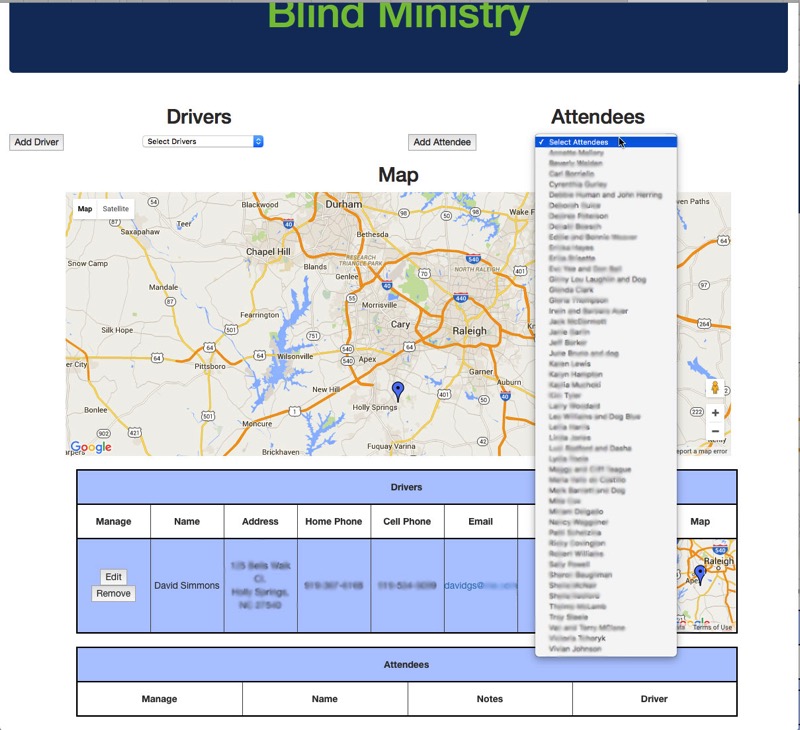
Next you select Attendees from the Attendees Drop Down list.
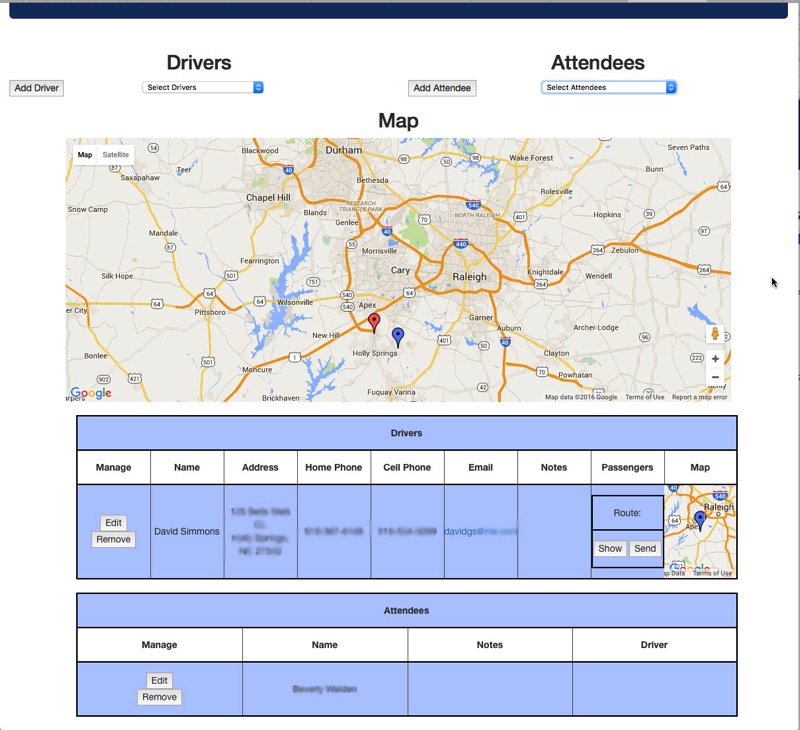
As you add Attendees they are added to the Attendees Table, and a Red Pin is added to the Main Map. As you select more and more Attendees, you’ll see more and more Red Pins on the Main Map.
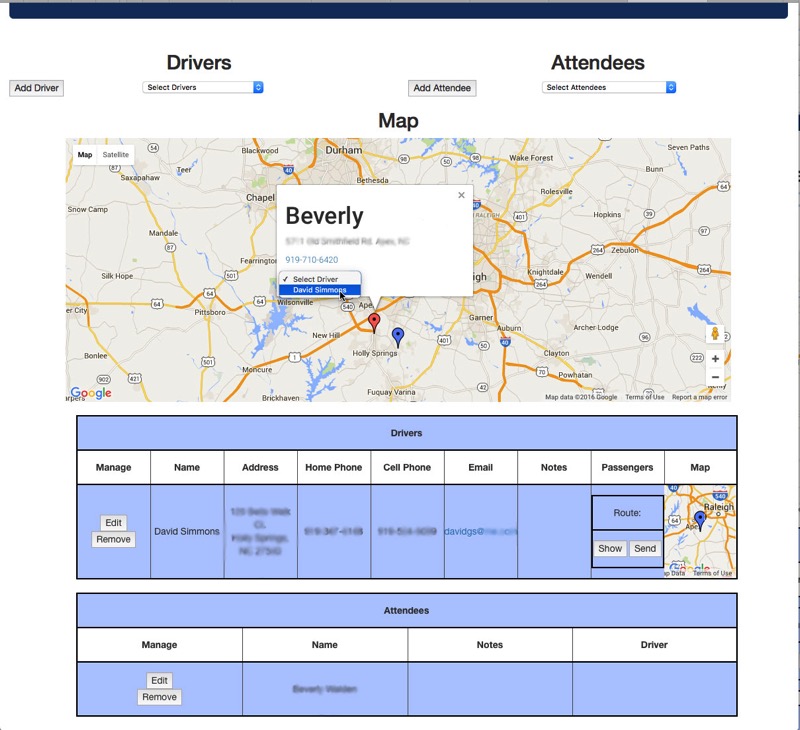
When you click on an Attendee’s pin, you get a pop-up with their information (name, address, phone number) and another pull-down list that contains all the drivers available. Just select a Driver for that Attendee. You may notice a potential problem here. What if I add more drivers to the map later? Will they show up in the pull downs of the attendees? Of course they will! I simply added a JavaScript onmousedown() handler to the <select> for the driver’s list, and in there I walk the Table of Drivers to build the Select List:
for (var i = 1, row; row = dTable.rows[i]; i++) {
  //iterate through rows
  //rows would be accessed using the "row" variable assigned in the for loop
  for (var j = 0, col; col = row.cells[j]; j++) {
    if(j == 0){
      id = col.childNodes[0].value;
    }
    if(j == 1){
      selContent += "<option value='" + id + ":" + popup.split('-').pop() + "'>" + col.innerHTML + "</option>";
      sel.innerHTML = selContent;
    }
  }
}
It is a little more complicated than you might think is necessary because I reference everything by the id from the MongoDB database so that I can look it up later more easily. I don’t keep track of the Driver’s address, phone number, etc. from the tables because a lookup by id is very fast, so as long as I have the id handy, I can get any other information quickly.
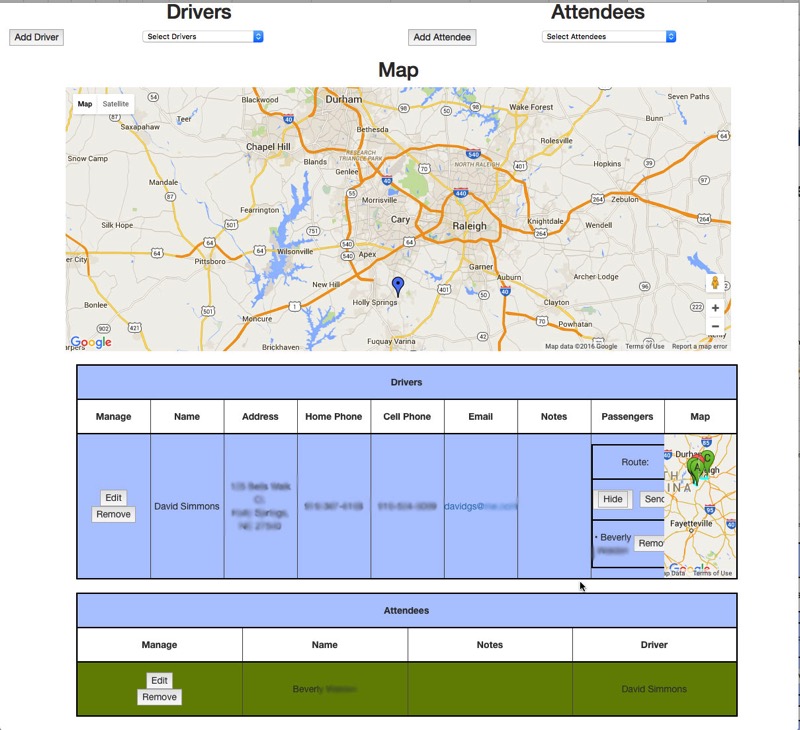
Once you assign a Driver to an Attendee, their Red Pin is moved from the Main Map to the Driver’s mini-map on which you can Show/Hide the actual driving route. Yes, it’s small, and hard to see the actual route. Also, the Attendee’s entry in the Attendee table is turned green and a Driver Name is filled in for them. This is so that it is easy to tell when everyone has a driver and you’re done) No more red pins on the main map and all the Attendees are green.
So what’s missing?
Well, you see the ‘Send’ button, which, in an ideal world, would gather all the information about each Attendee and send an email to the driver with all that information, etc. But this isn’t an ideal world, and using JavaScript in a browser, you can’t really do all that. Instead you get a pop-up window with a nicely formatted email message, complete with the list of the Attendees and all their information as well as a link to a google map with turn-by-turn directions. All you have to do it copy the whole text, close the dialog box, click on the driver’s email link, paste in the text and send. I wish there were a better way, but a) I don’t want to do any server-side code to send the email and b) it’s not possible to send a fully formatted (either HTML or RTF) from a ‘mailto’ link, so I’m stuck with this.
So how is this implemented? It’s all in JavaScript! I used StrongLoop, as I said, to build the Node.js/Loopback framework which gave me all the ReST APIs I needed into the MongoDB backend, plus the Node.js server to serve it all up. That part is incredibly powerful, actually. If you’re trying to put REST APIs onto your database I highly recommend giving StrongLoop a whirl. Especially the ARC where you can use a browser to design your data models, etc. As I said earlier, I really only keep the database ID in the browser. So everything – and I do mean everything – is referenced by that ID. How does that work? Well, let’s take the example of adding an Attendee to a Driver’s list of passengers. I have a function that is called when you select a driver from the drop-down list (remember we talked about building that list on the fly earlier). Once a Driver is selected, we have to add that Attendee to that Driver’s list. So selecting a driver calls the driverSelected() function with a tuple of the driver’s ID and the Attendee’s ID. Here’s how that works:
  // everything is referenced by ID!
  var selRow = document.getElementById(ids[1]);
  selRow.style.background=routed; // set Attendees background green
  var driverCell = document.getElementById(ids[1]).cells[3];
  var url = dbServerURL + "Attendees/" + ids[1];
  jQuery.getJSON(url, function(data) { // look up the Attendee's info in the DB
  var tbl = document.getElementById("pList-" + ids[0] + "-Table");
  var row = tbl.insertRow(-1);
  row.id = data.id; // everything referenced by ID
  var cell = row.insertCell(0);
  cell.innerHTML = "• " + data.Name;
  driverCell.innerHTML = driverName;
  cell = row.insertCell(1);
  cell.innerHTML = "<button id="" + data.id + "" onclick="clearCell(this.id, this.value)" value="" + ids[0] + "" name="Remove">Remove</button>"
  for(var x = 0; x < driverList.length; x++){
    if(driverList[x].id == ids[0]){
      addToMap(data.id, "Attendees", driverList[x].map); // add the the Driver's map
      break;
    }
  }
});
As you can see, I really do use the ID for everything. I insert elements into the DOM using the ID. Each Driver gets a Table, and in that table is another table of Attendees for that driver, and it’s named pList-ID-Table so it’s easy to find. And alter. I keep a list of the maps for each driver, again referenced by the Driver’s ID, so that I can add pins to it (or remove pins from it). The entire application is about 1,000 lines of JavaScript in the browser to properly fetch and display and manipulate all the data from the backend. But thanks to loopback, I could make very fast queries to the database and get back easily manipulated JSON objects to work with. To make this application easy to move from server to server, I simply added an initialization variable in the browser code to set the server:
var dbServerURL= "http://" + location.host + "/api/";
To look up Attendee data, I just append the Attendees database name to the end, and to look up Drivers data, I append the Drivers database name to the end. To look up a specific driver, I just append the driver’s ID to the end of that.
var url = dbServerURL + "Drivers/" + id
jQuery.getJSON(url, function(data){ ... }
And I get back a nice JSON object with all the Driver’s information in it. Extracting information from JSON is dead-simple, of course, using something along the lines of:
var id = data.id;
var driverName = data.Name;
etc. It’s really that simple.
It turns out that hosting Node.js apps is harder than one would think. I tried for days to get it running on OpenShift, but to no avail. The documentation from StrongLoop on how to do that is both old and incomplete and I so far have not figured out how to make it work. The docs from OpenShift simply don’t work. What I finally found was a simple, free way to deploy this on AWS. Pretty straight forward, and when I have time, I can write up how to do that as well.
I’ve sent the basic instructions and address to the coordinator who handles the routing and she has now successfully done the routing for a couple of dinners. Her comment to me was “that sure is a lot easier and faster than the way I used to do it!” The whole thing is wrapped in bootstrap code, so in theory it should also be usable from a mobile device, but in my tests on an iPhone, it tends not to do so well with the maps, making it not very useful.
 English
 Deutsche
 Dutch
Dutch Español
 Français